建站记-2
(全文共526字,预计阅读时间1-2分钟)
新年快乐!
因为各种原因,本博客已经很久没有维护,发现已经无法访问,加上原本使用的valine评论系统存在xss漏洞,且原先使用的主题已经久未更新,决定放弃修复,直接换用Hexo+NexT主题,评论系统换用livere来必力,简单记录。
快速,简洁且高效的博客框架
——摘自Hexo官网
1,安装node.js环境
访问node.js官网,”https://nodejs.org/en",下载LTS长期支持版,安装.
检查:node -v npm -v
2,npm换源
npm config set registry https://registry.npmmirror.com
3,安装hexo
npm install -g hexo-cli
检查:hexo -v
4,hexo初始化
hexo init blog_name
cd blog_name
npm install
5,查看效果
hexo g
hexo s //打开本地服务
浏览器打开http://localhost:4000看效果
命令行中Ctrl+C关闭本地服务
6,配置git
github新建repo,名称github_username.github.io(github_username换成自己的github用户名)
安装git
git config --global user.name "xxxxxx"
git config --global user.email "[email protected]"
ssh-keygen -t rsa -C "your_email"
在”C:\Users\username\ .ssh”目录找到id_rsa.pub文件
在Github的设置中,找到SSH and GPG keys,新建SSH Key,记事本打开id_rsa.pub文件,将内容复制到Key,标题随便起,添加Key。
7,部署
打开_config.yml,底部deploy改成
deploy:
  type: git
  repository: [email protected]:github_username/github_username.github.io.git
  branch: main
运行npm install hexo-deployer-git --save
部署代码:
hexo clean
hexo generate
hexo deploy
8,cloudflare配置(自定义域名+cdn加速,可省略)
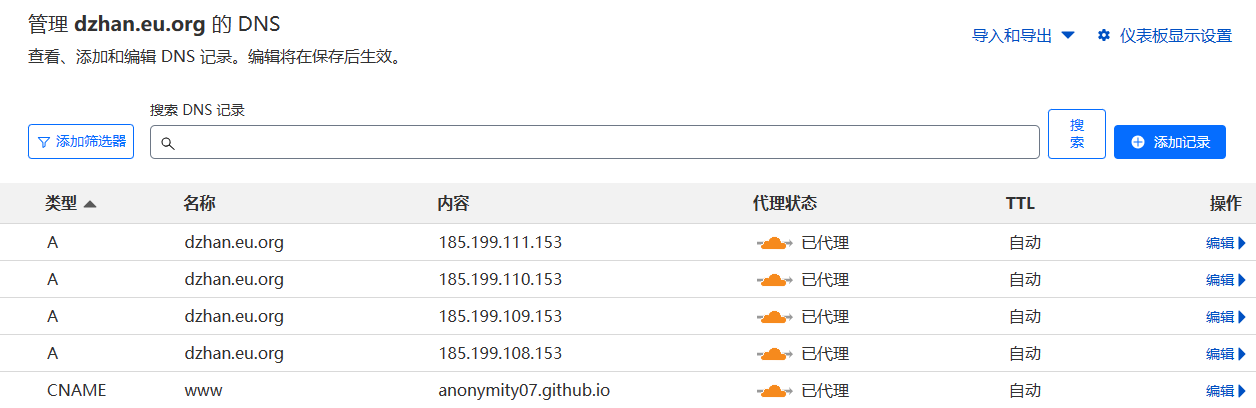
添加如上几条dns记录,暂时都关掉代理,设成仅dns;ssl/tls设成完全(严格)
9,github pages 配置
来到GitHub repo settings中的pages页面,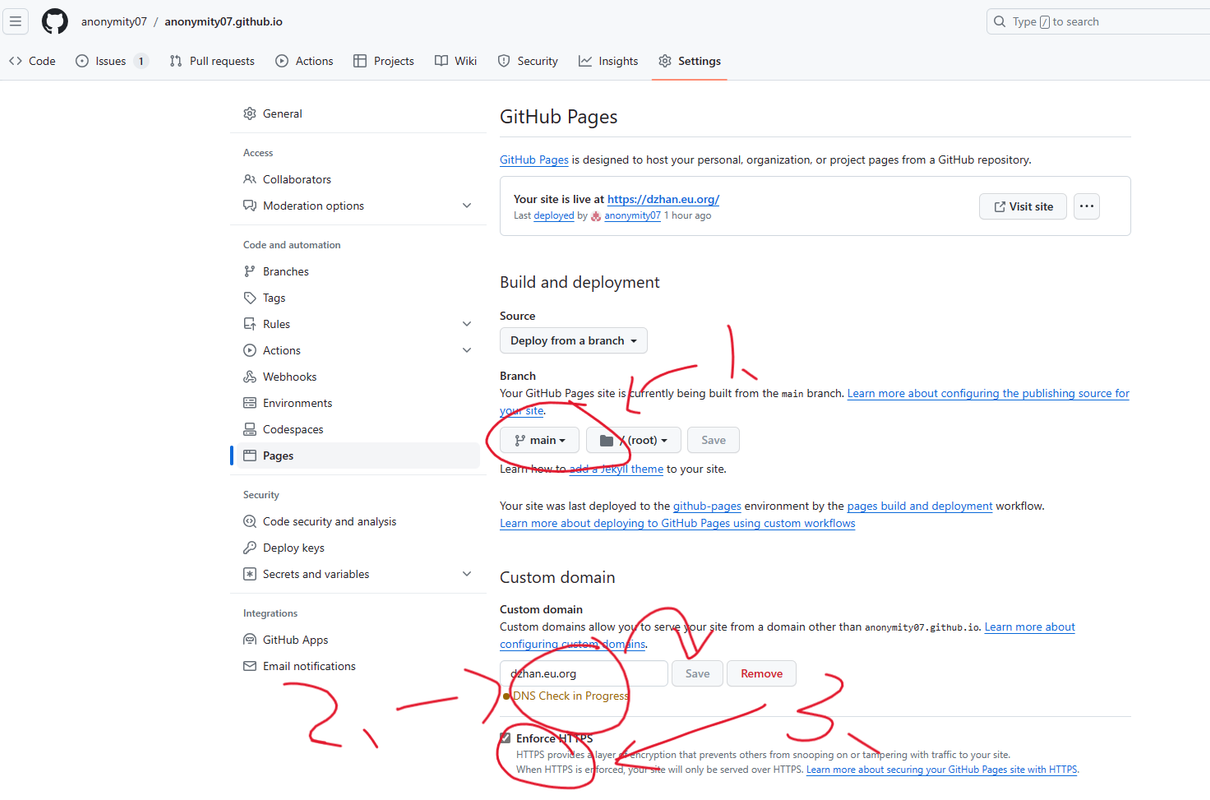
如图,三步。
回到cloudflare,打开代理。
10,NexT主题
cd hexo-site
git clone https://github.com/next-theme/hexo-theme-next themes/next
打开站点_config.yml,
翻到最后,修改为:theme: next
11,NexT配置/美化
个人喜好,自行百度